Once the exclusive realm of large tech companies, messaging apps are becoming more ubiquitous because of the rise of chat API. This tutorial will enable you to create a messaging app from scratch, with only a few hundred lines of client-side code, and without the need for a server or even registration.
This guide will be carried out in Android Studio. It uses the SendBird Android SDK, which provides methods to easily send, fetch, and receive messages in real-time. The complete app is on GitHub.
1. Import dependencies
For this tutorial, we will be using the v7 AppCompat, Design Support, Constraint Layout, and Glide libraries, as well as the SendBird Android SDK.
Add these lines to your app-level build.gradle file.
| repositories { |
| maven { url "https://raw.githubusercontent.com/smilefam/SendBird-SDK-Android/master/" } |
| } |
|
|
| dependencies { |
| compile 'com.android.support:appcompat-v7:25.3.1' |
| compile 'com.android.support:design:25.3.1' |
| compile 'com.android.support.constraint:constraint-layout:1.0.2' |
| |
| compile 'com.sendbird.sdk:sendbird-android-sdk:3.0.27' |
| compile 'com.github.bumptech.glide:glide:3.7.0' |
| } |
2. Create a sign-in screen
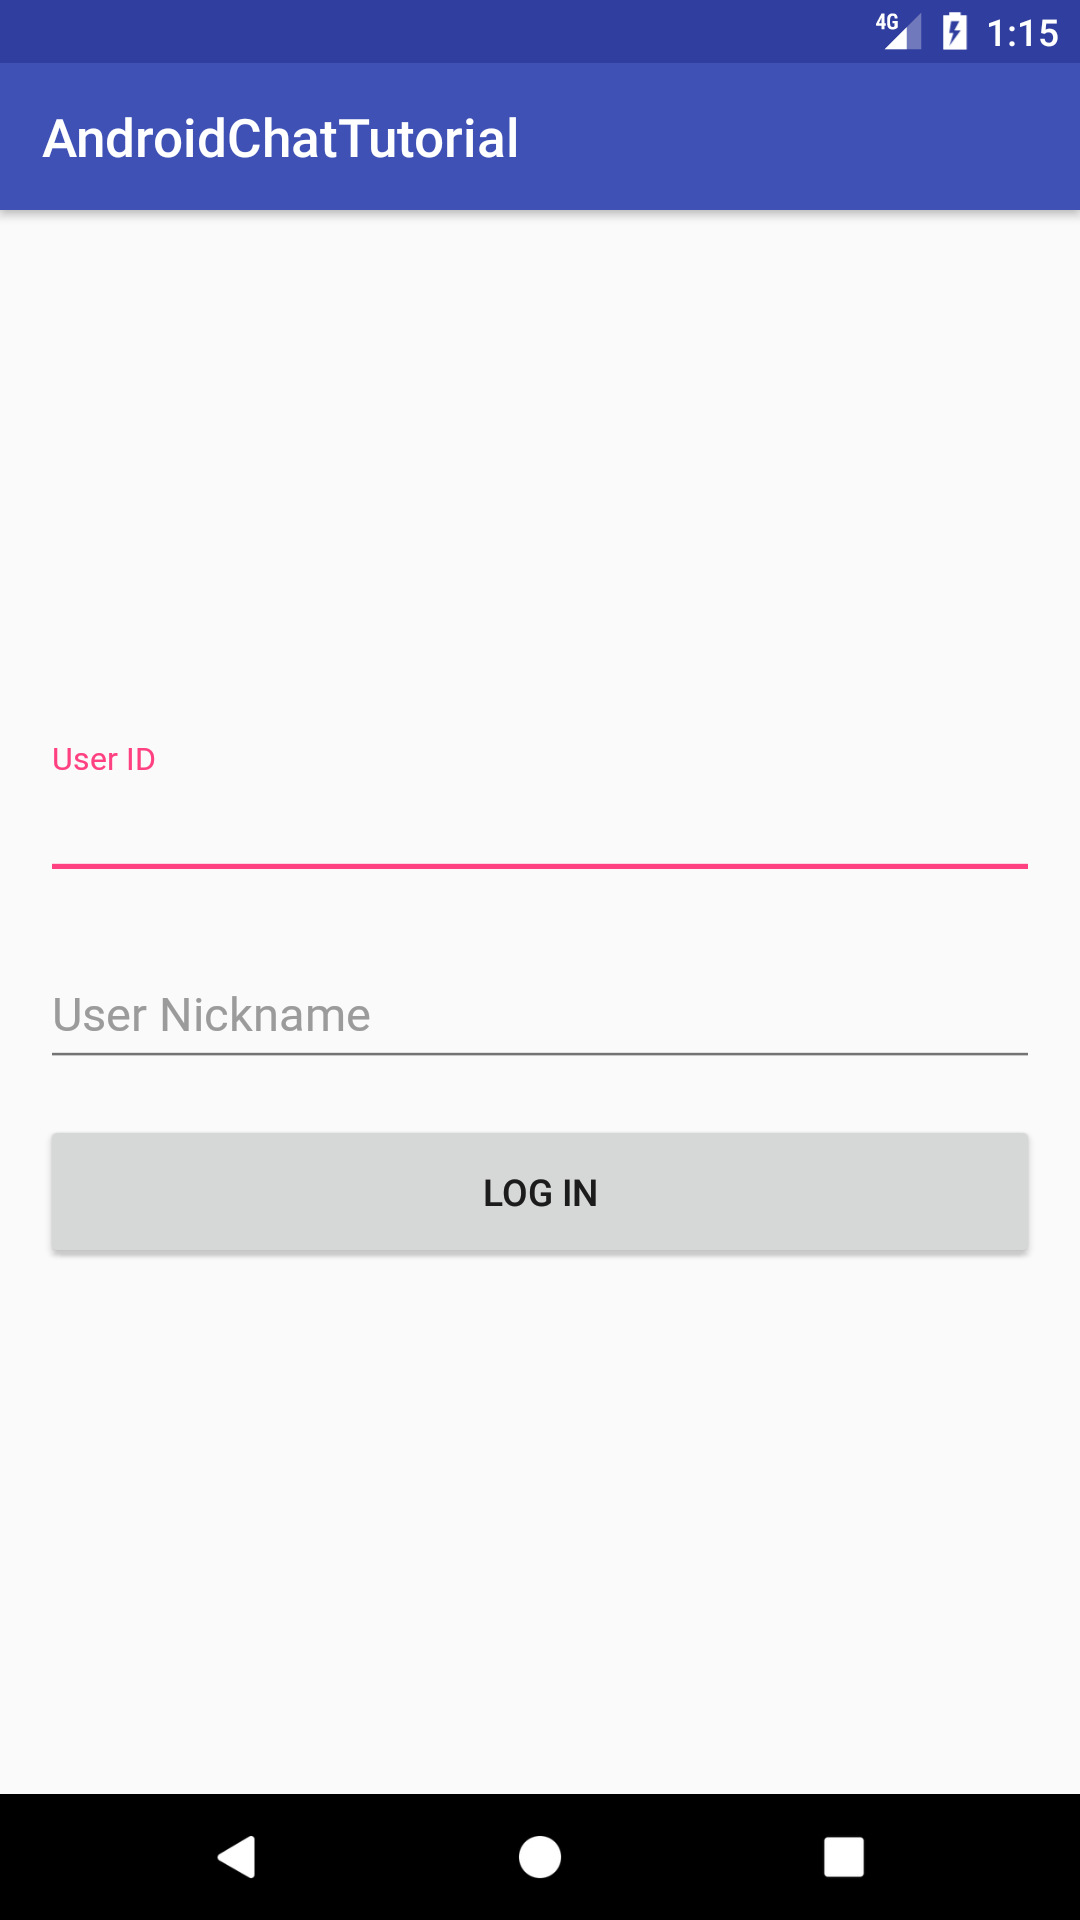
In order to use the SendBird SDK, you must specify a username and nickname. You do not need a separate registration process as unknown usernames automatically create a new user. Your nickname is displayed beside each message you send.
Create an XML file with two TextInputEditTexts and a login button.
activity_login.xml
| <?xml version="1.0" encoding="utf-8"?> |
|
|
| <android.support.constraint.ConstraintLayout xmlns:android="http://schemas.android.com/apk/res/android" |
| xmlns:app="http://schemas.android.com/apk/res-auto" |
| xmlns:tools="http://schemas.android.com/tools" |
| android:layout_width="match_parent" |
| android:layout_height="match_parent" |
| android:layout_marginLeft="16dp" |
| android:layout_marginRight="16dp" |
| tools:context="com.sendbird.androidchattutorial.LoginActivity"> |
|
|
| <android.support.design.widget.TextInputLayout |
| android:id="@+id/text_input_login_user_id" |
| android:layout_width="0dp" |
| android:layout_height="wrap_content" |
| android:hint="User ID" |
| app:layout_constraintVertical_chainStyle="packed" |
| app:layout_constraintRight_toRightOf="parent" |
| app:layout_constraintLeft_toLeftOf="parent" |
| app:layout_constraintTop_toTopOf="parent" |
| app:layout_constraintBottom_toTopOf="@+id/text_input_login_user_nickname" |
| android:layout_marginBottom="16dp"> |
|
|
| <android.support.design.widget.TextInputEditText |
| android:id="@+id/edit_text_login_user_id" |
| android:layout_width="match_parent" |
| android:layout_height="wrap_content" |
| android:imeOptions="actionNext"/> |
|
|
| </android.support.design.widget.TextInputLayout> |
|
|
| <android.support.design.widget.TextInputLayout |
| android:id="@id/text_input_login_user_nickname" |
| android:layout_width="0dp" |
| android:layout_height="wrap_content" |
| app:layout_constraintTop_toBottomOf="@id/text_input_login_user_id" |
| app:layout_constraintLeft_toLeftOf="parent" |
| app:layout_constraintRight_toRightOf="parent" |
| app:layout_constraintBottom_toTopOf="@+id/button_login" |
| android:hint="User Nickname" |
| android:layout_marginBottom="16dp"> |
|
|
| <android.support.design.widget.TextInputEditText |
| android:id="@+id/edit_text_login_user_nickname" |
| android:layout_width="match_parent" |
| android:layout_height="wrap_content" |
| android:imeOptions="actionDone"/> |
|
|
| </android.support.design.widget.TextInputLayout> |
|
|
| <Button |
| android:id="@id/button_login" |
| android:text="Log in" |
| android:layout_width="0dp" |
| android:layout_height="56dp" |
| app:layout_constraintLeft_toLeftOf="parent" |
| app:layout_constraintRight_toRightOf="parent" |
| app:layout_constraintBottom_toBottomOf="parent" |
| app:layout_constraintTop_toBottomOf="@+id/text_input_login_user_nickname" |
| app:layout_constraintVertical_chainStyle="packed"/> |
|
|
| </android.support.constraint.ConstraintLayout> |
When the button is pressed, we will use these fields to log in to the SendBird servers. First, initialize the SDK by calling SendBird.init(), passing in the APP ID provided in the code below. Then, connect with SendBird.connect() and update the user’s nickname with SendBird.updateCurrentUserInfo().
LoginActivity.java
| public class LoginActivity extends AppCompatActivity { |
| // Sample APP ID provided by SendBird |
| private static final String APP_ID = "9DA1B1F4-0BE6-4DA8-82C5-2E81DAB56F23"; |
|
|
| private Button mConnectButton; |
| private TextInputEditText mUserIdEditText, mUserNicknameEditText; |
|
|
| @Override |
| protected void onCreate(Bundle savedInstanceState) { |
| super.onCreate(savedInstanceState); |
| setContentView(R.layout.activity_login); |
|
|
| mConnectButton = (Button) findViewById(R.id.button_login); |
| mUserIdEditText = (TextInputEditText) findViewById(R.id.edit_text_login_user_id); |
| mUserNicknameEditText = (TextInputEditText) findViewById(R.id.edit_text_login_user_nickname); |
|
|
| // Initialize the SendBird SDK. |
| SendBird.init(APP_ID, this.getApplicationContext()); |
|
|
| mConnectButton.setOnClickListener(new View.OnClickListener() { |
| @Override |
| public void onClick(View v) { |
| String userId = mUserIdEditText.getText().toString(); |
| // Remove all spaces from userID |
| userId = userId.replaceAll("\\s", ""); |
|
|
| String userNickname = mUserNicknameEditText.getText().toString(); |
|
|
| connectToSendBird(userId, userNickname); |
| } |
| }); |
| } |
|
|
| /** |
| * Attempts to connect a user to SendBird. |
| * @param userId The unique ID of the user. |
| * @param userNickname The user's nickname, which will be displayed in chats. |
| */ |
| private void connectToSendBird(final String userId, final String userNickname) { |
| mConnectButton.setEnabled(false); |
|
|
| SendBird.connect(userId, new SendBird.ConnectHandler() { |
| @Override |
| public void onConnected(User user, SendBirdException e) { |
|
|
| if (e != null) { |
| // Error! |
| Toast.makeText( |
| LoginActivity.this, "" + e.getCode() + ": " + e.getMessage(), |
| Toast.LENGTH_SHORT) |
| .show(); |
|
|
| // Show login failure snackbar |
| mConnectButton.setEnabled(true); |
| return; |
| } |
|
|
| // Update the user's nickname |
| updateCurrentUserInfo(userNickname); |
|
|
| Intent intent = new Intent(LoginActivity.this, ChatActivity.class); |
| startActivity(intent); |
| finish(); |
| } |
| }); |
| } |
|
|
| /** |
| * Updates the user's nickname. |
| * @param userNickname The new nickname of the user. |
| */ |
| private void updateCurrentUserInfo(String userNickname) { |
| SendBird.updateCurrentUserInfo(userNickname, null, new SendBird.UserInfoUpdateHandler() { |
| @Override |
| public void onUpdated(SendBirdException e) { |
| if (e != null) { |
| // Error! |
| Toast.makeText( |
| LoginActivity.this, "" + e.getCode() + ":" + e.getMessage(), |
| Toast.LENGTH_SHORT) |
| .show(); |
|
|
| return; |
| } |
|
|
| } |
| }); |
| } |
|
|
| } |
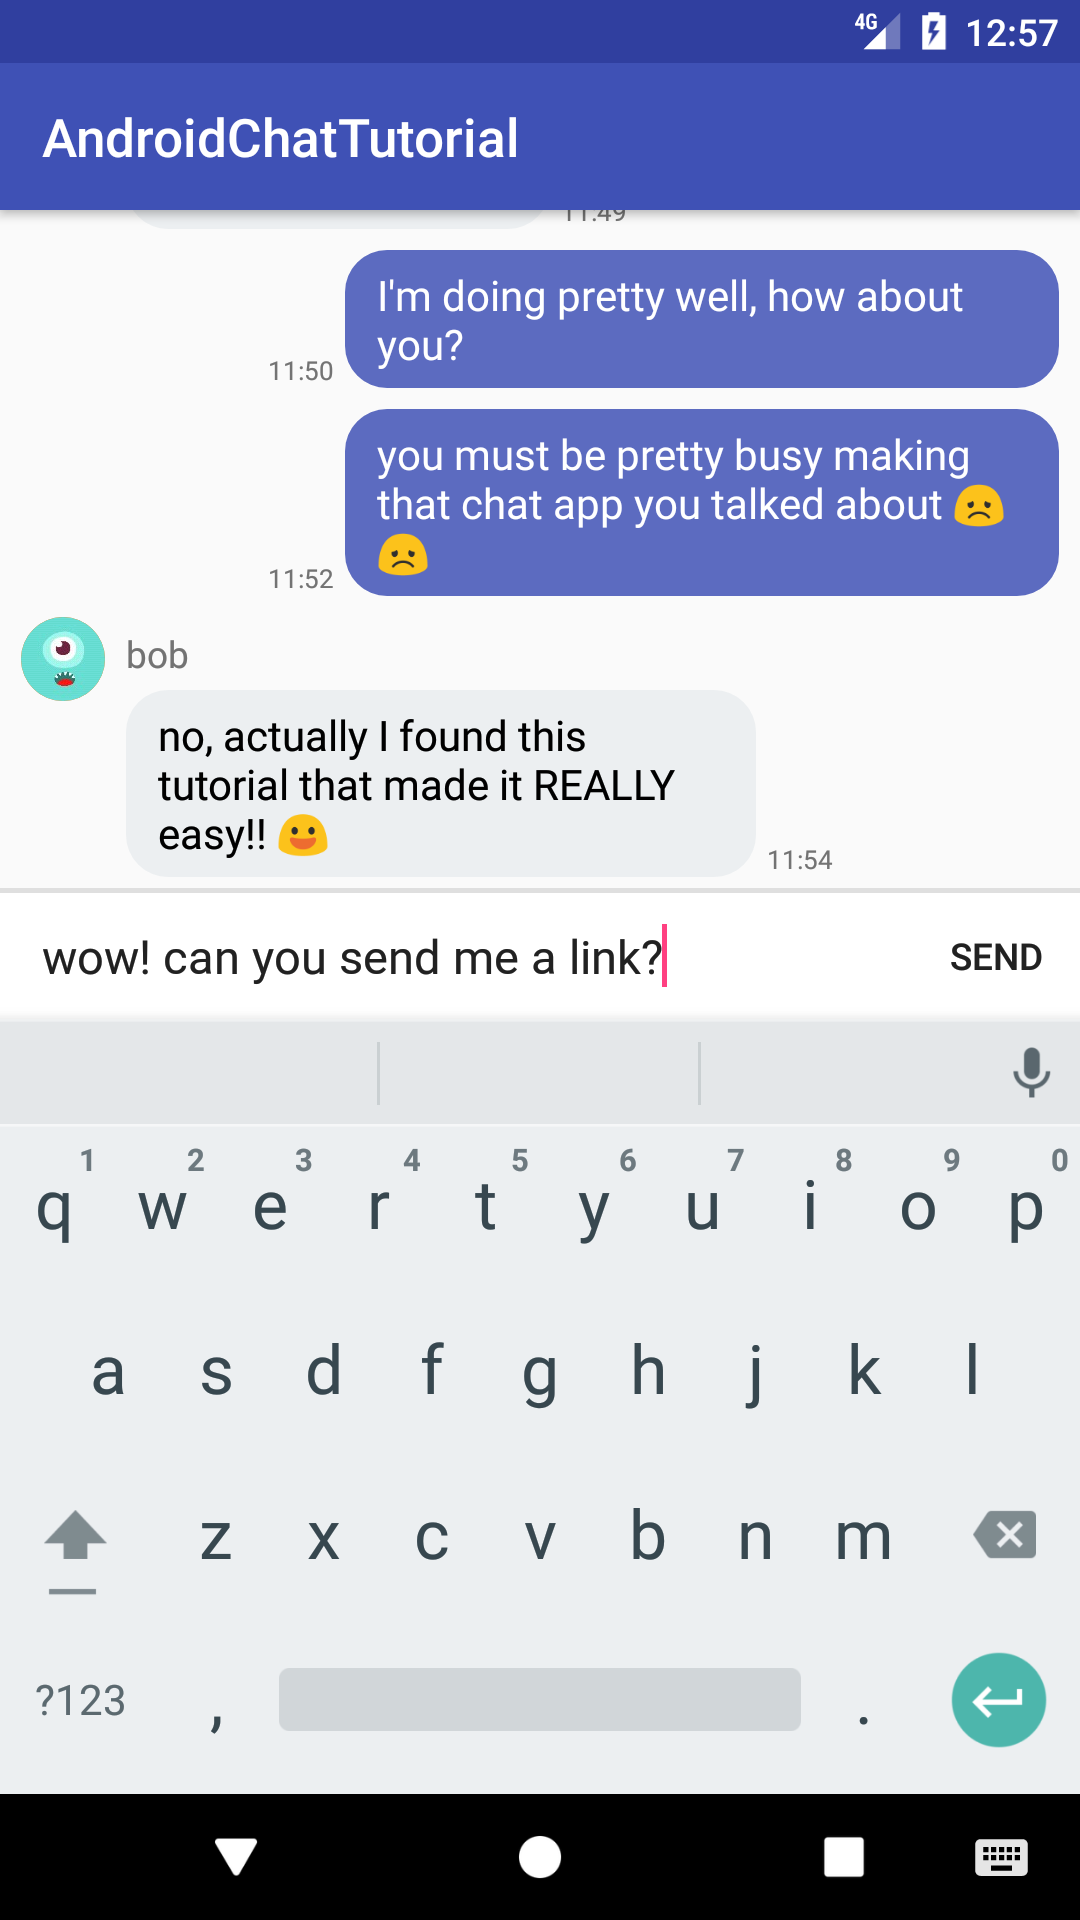
3. Implement a messaging UI
Next, we will create a new Activity called ChatActivity. This will be the main screen, and contain chat bubbles as well as a chatbox where you can type and send messages. Create the activity as well as a corresponding XML file, activity_chat.xml.
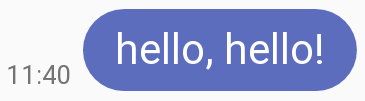
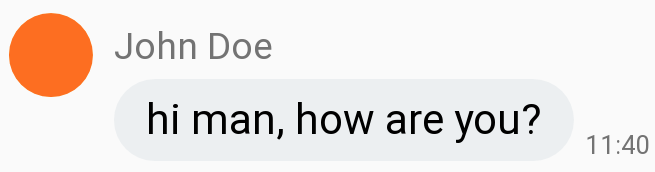
We will have to implement several XML files for the layout. This part is covered in depth in another blog post, Building a messaging UI - reference the link for more detailed descriptions. To summarize, you need three layouts: (1) the main screen with a chatbox and a RecyclerView to display messages, (2) a layout for received messages, and (3) a layout for sent messages. A vertical RecyclerView will be the container for a list of messages. Each message will be encased in a colored background drawable, making a chat bubble.
(1) activity_chat.xml
| <android.support.constraint.ConstraintLayout |
| xmlns:android="http://schemas.android.com/apk/res/android" |
| xmlns:app="http://schemas.android.com/apk/res-auto" |
| android:layout_width="match_parent" |
| android:layout_height="match_parent"> |
| |
| <android.support.v7.widget.RecyclerView |
| android:id="@+id/reycler_chat" |
| android:layout_width="0dp" |
| android:layout_height="0dp" |
| android:paddingBottom="4dp" |
| android:clipToPadding="false" |
| app:layout_constraintTop_toTopOf="parent" |
| app:layout_constraintLeft_toLeftOf="parent" |
| app:layout_constraintRight_toRightOf="parent" |
| app:layout_constraintBottom_toTopOf="@+id/divider_chat" |
| android:scrollbars="vertical"> |
| |
| </android.support.v7.widget.RecyclerView> |
|
|
| <!-- A horizontal line between the chatbox and RecyclerView --> |
| <View |
| android:id="@id/divider_chat" |
| android:layout_width="0dp" |
| android:layout_height="2dp" |
| android:background="#dfdfdf" |
| android:layout_marginBottom="0dp" |
| app:layout_constraintBottom_toTopOf="@+id/layout_chat_chatbox" |
| app:layout_constraintLeft_toLeftOf="parent" |
| app:layout_constraintRight_toRightOf="parent"/> |
|
|
| <LinearLayout |
| android:id="@+id/layout_chat_chatbox" |
| android:layout_width="0dp" |
| android:layout_height="wrap_content" |
| android:orientation="horizontal" |
| android:minHeight="48dp" |
| android:background="#ffffff" |
| app:layout_constraintBottom_toBottomOf="parent" |
| app:layout_constraintRight_toRightOf="parent" |
| app:layout_constraintLeft_toLeftOf="parent"> |
|
|
| <EditText |
| android:id="@+id/edittext_chat" |
| android:hint="Enter message" |
| android:background="@android:color/transparent" |
| android:layout_gravity="center" |
| android:layout_marginLeft="16dp" |
| android:layout_marginRight="16dp" |
| android:layout_width="0dp" |
| android:layout_weight="1" |
| android:layout_height="wrap_content" |
| android:maxLines="6"/> |
|
|
| <Button |
| android:id="@+id/button_chat_send" |
| android:text="SEND" |
| android:textSize="14dp" |
| android:background="?attr/selectableItemBackground" |
| android:clickable="true" |
| android:layout_width="64dp" |
| android:layout_height="48dp" |
| android:gravity="center" |
| android:layout_gravity="bottom" /> |
| </LinearLayout> |
|
|
| </android.support.constraint.ConstraintLayout> |
(2) item_message_sent.xml
| <?xml version="1.0" encoding="utf-8"?> |
|
|
| <android.support.constraint.ConstraintLayout |
| xmlns:android="http://schemas.android.com/apk/res/android" |
| xmlns:app="http://schemas.android.com/apk/res-auto" |
| xmlns:tools="http://schemas.android.com/tools" |
| android:layout_width="match_parent" |
| android:layout_height="wrap_content" |
| android:paddingTop="8dp"> |
| |
| <TextView |
| android:id="@+id/text_message_body" |
| android:text="hello, hello!" |
| android:background="@drawable/rounded_rectangle_blue" |
| android:layout_width="wrap_content" |
| android:layout_height="wrap_content" |
| android:maxWidth="272dp" |
| android:paddingLeft="12dp" |
| android:paddingRight="12dp" |
| android:paddingTop="6dp" |
| android:paddingBottom="6dp" |
| android:textSize="16sp" |
| android:textColor="#ffffff" |
| android:layout_marginRight="8dp" |
| app:layout_constraintRight_toRightOf="parent" |
| app:layout_constraintTop_toTopOf="parent" /> |
|
|
| <TextView |
| android:id="@+id/text_message_time" |
| android:text="11:40" |
| android:layout_width="wrap_content" |
| android:layout_height="wrap_content" |
| android:textSize="10sp" |
| android:layout_marginRight="4dp" |
| app:layout_constraintBottom_toBottomOf="@+id/text_message_body" |
| app:layout_constraintRight_toLeftOf="@+id/text_message_body" /> |
|
|
| </android.support.constraint.ConstraintLayout> |
(3) item_message_received.xml
| <?xml version="1.0" encoding="utf-8"?> |
|
|
| <android.support.constraint.ConstraintLayout |
| xmlns:android="http://schemas.android.com/apk/res/android" |
| xmlns:app="http://schemas.android.com/apk/res-auto" |
| xmlns:tools="http://schemas.android.com/tools" |
| android:layout_width="match_parent" |
| android:layout_height="wrap_content" |
| android:paddingTop="8dp"> |
| |
| <ImageView |
| android:id="@+id/image_message_profile" |
| android:layout_width="32dp" |
| android:layout_height="32dp" |
| android:background="@drawable/circle" |
| app:layout_constraintTop_toTopOf="parent" |
| android:layout_marginLeft="8dp" |
| app:layout_constraintLeft_toLeftOf="parent" /> |
|
|
| <TextView |
| android:id="@+id/text_message_name" |
| android:text="John Doe" |
| android:layout_width="wrap_content" |
| android:layout_height="wrap_content" |
| android:textSize="14sp" |
| app:layout_constraintLeft_toRightOf="@+id/image_message_profile" |
| android:layout_marginLeft="8dp" |
| app:layout_constraintTop_toTopOf="parent" |
| android:layout_marginTop="4dp" /> |
|
|
| <TextView |
| android:id="@+id/text_message_body" |
| android:text="hi man, how are you?" |
| android:background="@drawable/rounded_rectangle_gray" |
| android:layout_width="wrap_content" |
| android:layout_height="wrap_content" |
| android:maxWidth="240dp" |
| android:paddingLeft="12dp" |
| android:paddingRight="12dp" |
| android:paddingTop="6dp" |
| android:paddingBottom="6dp" |
| android:textSize="16sp" |
| android:textColor="#000000" |
| android:layout_marginTop="4dp" |
| app:layout_constraintTop_toBottomOf="@+id/text_message_name" |
| app:layout_constraintLeft_toRightOf="@+id/image_message_profile" |
| android:layout_marginLeft="8dp" /> |
|
|
| <TextView |
| android:id="@+id/text_message_time" |
| android:text="11:40" |
| android:layout_width="wrap_content" |
| android:layout_height="wrap_content" |
| android:textSize="10sp" |
| app:layout_constraintLeft_toRightOf="@+id/text_message_body" |
| android:layout_marginLeft="4dp" |
| app:layout_constraintBottom_toBottomOf="@+id/text_message_body" /> |
|
|
| </android.support.constraint.ConstraintLayout> |
4. Create an Adapter for the RecyclerView
To bind these XML components to actual data, we must create an Adapter for the RecyclerView. First, create a nested class within ChatActivity called ChatAdapter, which should subclass RecyclerView.Adapter. This adapter will hold two types of ViewHolders: one for received messages, and one for sent messages. Utils here is a convenience class that contains methods for formatting timestamps into readable formats and rendering images from URLs. You can view the whole code here. Create two classes nested within ChatAdapter.
ChatActivity.java
| // Messages sent by me do not display a profile image or nickname. |
| private class SentMessageHolder extends RecyclerView.ViewHolder { |
| TextView messageText, timeText; |
|
|
| SentMessageHolder(View itemView) { |
| super(itemView); |
|
|
| messageText = (TextView) itemView.findViewById(R.id.text_message_body); |
| timeText = (TextView) itemView.findViewById(R.id.text_message_time); |
| } |
|
|
| void bind(UserMessage message) { |
| messageText.setText(message.getMessage()); |
|
|
| // Format the stored timestamp into a readable String using method. |
| timeText.setText(Utils.formatTime(message.getCreatedAt())); |
| } |
| } |
|
|
| // Messages sent by others display a profile image and nickname. |
| private class ReceivedMessageHolder extends RecyclerView.ViewHolder { |
| TextView messageText, timeText, nameText; |
| ImageView profileImage; |
|
|
| ReceivedMessageHolder(View itemView) { |
| super(itemView); |
|
|
| messageText = (TextView) itemView.findViewById(R.id.text_message_body); |
| timeText = (TextView) itemView.findViewById(R.id.text_message_time); |
| nameText = (TextView) itemView.findViewById(R.id.text_message_name); |
| profileImage = (ImageView) itemView.findViewById(R.id.image_message_profile); |
| } |
|
|
| void bind(UserMessage message) { |
| messageText.setText(message.getMessage()); |
| nameText.setText(message.getSender().getNickname()); |
| Utils.displayRoundImageFromUrl(ChatActivity.this, |
| message.getSender().getProfileUrl(), profileImage); |
| timeText.setText(Utils.formatTime(message.getCreatedAt())); |
|
|
| } |
| } |
|
|
|
|
| } |
| } |
Next, we will implement methods within the adapter to fetch messages from the server and store them in an ArrayList.
| // Retrieves 30 most recent messages. |
| void refresh() { |
| mChannel.getPreviousMessagesByTimestamp(Long.MAX_VALUE, true, 30, true, |
| BaseChannel.MessageTypeFilter.USER, null, new BaseChannel.GetMessagesHandler() { |
| @Override |
| public void onResult(List<BaseMessage> list, SendBirdException e) { |
| if (e != null) { |
| e.printStackTrace(); |
| return; |
| } |
| mMessageList = (ArrayList<BaseMessage>) list; |
|
|
| notifyDataSetChanged(); |
|
|
| } |
| }); |
|
|
| } |
|
|
| void loadPreviousMessages() { |
| final long lastTimestamp = mMessageList.get(mMessageList.size() - 1).getCreatedAt(); |
| mChannel.getPreviousMessagesByTimestamp(lastTimestamp, false, 30, true, |
| BaseChannel.MessageTypeFilter.USER, null, new BaseChannel.GetMessagesHandler() { |
| @Override |
| public void onResult(List<BaseMessage> list, SendBirdException e) { |
| if (e != null) { |
| e.printStackTrace(); |
| return; |
| } |
| mMessageList.addAll(list); |
|
|
| notifyDataSetChanged(); |
| } |
| }); |
| } |
|
|
| // Appends a new message to the beginning of the message list. |
| void appendMessage(UserMessage message) { |
| mMessageList.add(0, message); |
| notifyDataSetChanged(); |
| } |
|
|
| // Sends a new message, and appends the sent message to the beginning of the message list. |
| void sendMessage(final String message) { |
| mChannel.sendUserMessage(message, new BaseChannel.SendUserMessageHandler() { |
| @Override |
| public void onSent(UserMessage userMessage, SendBirdException e) { |
| if (e != null) { |
| e.printStackTrace(); |
| return; |
| } |
|
|
| mMessageList.add(0, userMessage); |
| notifyDataSetChanged(); |
| } |
| }); |
| } |
Finally, we will override classes in RecyclerView.Adapter to bind the XML files we wrote earlier to each of our fetched messages.
| // Determines the appropriate ViewType according to the sender of the message. |
| @Override |
| public int getItemViewType(int position) { |
| UserMessage message = (UserMessage) mMessageList.get(position); |
|
|
| if (message.getSender().getUserId().equals(SendBird.getCurrentUser().getUserId())) { |
| // If the current user is the sender of the message |
| return VIEW_TYPE_MESSAGE_SENT; |
| } else { |
| // If some other user sent the message |
| return VIEW_TYPE_MESSAGE_RECEIVED; |
| } |
| } |
|
|
| // Inflates the appropriate layout according to the ViewType. |
| @Override |
| public RecyclerView.ViewHolder onCreateViewHolder(ViewGroup parent, int viewType) { |
| View view; |
|
|
| if (viewType == VIEW_TYPE_MESSAGE_SENT) { |
| view = LayoutInflater.from(parent.getContext()) |
| .inflate(R.layout.item_message_sent, parent, false); |
| return new SentMessageHolder(view); |
| } else if (viewType == VIEW_TYPE_MESSAGE_RECEIVED) { |
| view = LayoutInflater.from(parent.getContext()) |
| .inflate(R.layout.item_message_received, parent, false); |
| return new ReceivedMessageHolder(view); |
| } |
|
|
| return null; |
| } |
|
|
| // Passes the message object to a ViewHolder so that the contents can be bound to UI. |
| @Override |
| public void onBindViewHolder(RecyclerView.ViewHolder holder, int position) { |
| UserMessage message = (UserMessage) mMessageList.get(position); |
|
|
| switch (holder.getItemViewType()) { |
| case VIEW_TYPE_MESSAGE_SENT: |
| ((SentMessageHolder) holder).bind(message); |
| break; |
| case VIEW_TYPE_MESSAGE_RECEIVED: |
| ((ReceivedMessageHolder) holder).bind(message); |
| } |
| } |
|
|
| @Override |
| public int getItemCount() { |
| return mMessageList.size(); |
| } |
View the full code for ChatAdapter here.
5. Initialize the RecyclerView with ChatAdapter
Using the SendBird methods OpenChannel.getChannel() and channel.enter(), we will enter a channel where we can talk to others. Unlike a ListView, a RecyclerView requires a LayoutManager in order to initialize. mLayoutManager.reverse() sets the first item at the bottom of the RecyclerView so that the newest messages are shown first when the Activity is opened.
| public class ChatActivity extends AppCompatActivity { |
| private final String mChannelUrl = "sendbird_open_channel_tutorial"; |
| private final static String CHANNEL_HANDLER_ID = "CHANNEL_HANDLER_CHAT"; |
|
|
| private ChatAdapter mChatAdapter; |
| private RecyclerView mRecyclerView; |
| private LinearLayoutManager mLayoutManager; |
| private Button mSendButton; |
| private EditText mMessageEditText; |
|
|
| @Override |
| protected void onCreate(Bundle savedInstanceState) { |
| super.onCreate(savedInstanceState); |
| setContentView(R.layout.activity_chat); |
|
|
| mSendButton = (Button) findViewById(R.id.button_chat_send); |
| mMessageEditText = (EditText) findViewById(R.id.edittext_chat); |
|
|
| mRecyclerView = (RecyclerView) findViewById(R.id.reycler_chat); |
| mLayoutManager = new LinearLayoutManager(this); |
| mLayoutManager.setReverseLayout(true); |
| mRecyclerView.setLayoutManager(mLayoutManager); |
|
|
| OpenChannel.getChannel(mChannelUrl, new OpenChannel.OpenChannelGetHandler() { |
| @Override |
| public void onResult(final OpenChannel openChannel, SendBirdException e) { |
| if (e != null) { |
| e.printStackTrace(); |
| return; |
| } |
|
|
| openChannel.enter(new OpenChannel.OpenChannelEnterHandler() { |
| @Override |
| public void onResult(SendBirdException e) { |
| if (e != null) { |
| e.printStackTrace(); |
| return; |
| }; |
|
|
| mChatAdapter = new ChatAdapter(openChannel); |
| mRecyclerView.setAdapter(mChatAdapter); |
| } |
| }); |
| } |
| }); |
|
|
| mSendButton.setOnClickListener(new View.OnClickListener() { |
| @Override |
| public void onClick(View v) { |
| mChatAdapter.sendMessage(mMessageEditText.getText().toString()); |
| mMessageEditText.setText(""); |
| } |
| }); |
|
|
| mRecyclerView.addOnScrollListener(new RecyclerView.OnScrollListener() { |
| @Override |
| public void onScrollStateChanged(RecyclerView recyclerView, int newState) { |
| if (mLayoutManager.findLastVisibleItemPosition() == mChatAdapter.getItemCount() - 1) { |
| mChatAdapter.loadPreviousMessages(); |
| } |
| } |
| }); |
|
|
| } |
6. Register a Channel Handler in ChatActivity
The last step is to register a Channel Handler, which automatically receives all incoming messages from the SendBird servers. When the onMessageReceived callback is called, invoke adapter.appendMessage() to display a new message at the bottom of the RecyclerView.
| @Override |
| protected void onResume() { |
| super.onResume(); |
|
|
| // Receives messages from SendBird servers |
| SendBird.addChannelHandler(CHANNEL_HANDLER_ID, new SendBird.ChannelHandler() { |
| @Override |
| public void onMessageReceived(BaseChannel baseChannel, BaseMessage baseMessage) { |
| if (baseChannel.getUrl().equals(mChannelUrl) && baseMessage instanceof UserMessage) { |
| mChatAdapter.appendMessage((UserMessage) baseMessage); |
| } |
| } |
| }); |
| } |
|
|
| @Override |
| protected void onPause() { |
| SendBird.removeChannelHandler(CHANNEL_HANDLER_ID); |
|
|
| super.onPause(); |
| } |
And that's it! Run the app on two devices (maybe one emulator and one actual device), log in with different usernames, and start chatting! You should see messages arriving on each device nearly instantly. If you are unsure about certain parts, reference the full source code available on GitHub.
If you want to take this app a step further, try out SendBird's open-source sample Android app. Constructed using the logic covered in this tutorial, it enables advanced features such as sending images, animated GIFs, and files. It also displays typing indicators, user lists, and much more, and should be a very useful reference for anyone planning to release a production chat app.
Read our API documentation


Alex